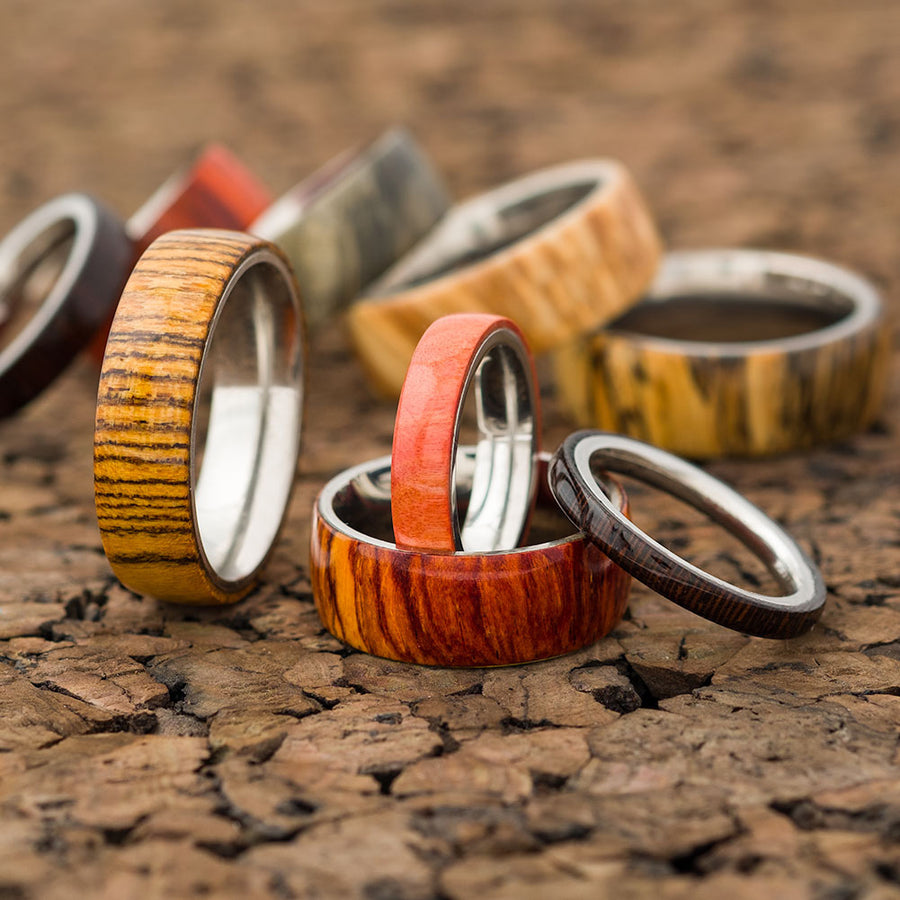


Making a Wood Inlay Ring
In this post, we make a wood inlay ring, focusing on a technique that eliminates visible seams and maximizes durability. We’ll break down the process and highlight key tips and tricks for achieving professional results.
Why This Method?
Traditional ring-making methods often involve threaded cores or inlays with visible seams. This method focuses on using solid wood blanks inlaid into a core, resulting in a seamless and more robust ring. The featured black ceramic inlay cores offer increased wall thickness for the wood, enhancing durability and protecting the wood from impact and chipping. They also eliminate the seam found in two-piece cores and the ceramic material itself is highly scratch-resistant, ensuring the ring’s longevity.
Material Selection
Choosing the right wood blank is crucial for this method. For this example, we used a stabilized Padauk ring blank. Here are the key considerations for selecting your wood:
-
Stabilized Wood: Stabilization protects the wood from moisture damage and ensures long-term durability.
-
Open Pore Grain: Open grain helps conceal the seam where the wood is joined around the core.
-
Grain Direction: The grain should run lengthwise along the blank (headstock to tailstock) for a clean break when fitting it around the core and to prevent splitting during turning.
- Natural Variation: Wood with natural variations helps camouflage the seam.
Other similar wood options include Koa, Wenge, Walnut, and Bocote.
The Turning Process
-
Waste Block Preparation: A flat waste block is essential for secure mounting. The video demonstrates how to true up the face of the block and slightly reduce its diameter.
-
Ring Blank Preparation: Ensure one side of the blank is sanded flat for optimal adhesion to the waste block. Clean both surfaces with denatured alcohol to remove oils and contaminants before applying double-faced tape.
-
Mounting the Blank: Use high-quality double-faced tape to attach the blank to the waste block. Apply pressure and allow time for a strong bond. A simple trick is to use the tailstock quill to apply and hold pressure to the blank.
-
Rough Turning: Use a spindle gouge to round the blank, supporting it with the tailstock to prevent it from being torn off the waste block.
-
Parting Off: Part off a section of the blank to be used for future rings, maximizing material usage.
-
Drilling: Drill a pilot hole through the center of the blank.
-
Boring: Utilize a ring boring head to precisely enlarge the hole to match the core’s outer diameter. This tool allows for fine-tuned adjustments and creates a clean, accurate fit.
-
Squaring the Face: Use the boring head to square off the outside face of the blank, ensuring a precise width.
-
Breaking the Blank: Carefully break the blank in half using a vise, ensuring a clean break along the grain.
-
Test Fitting: Dry-fit the two halves around the core to check for gaps and proper alignment.
-
Gluing: Apply a thin layer of CA glue (or preferably a two-part epoxy like West Systems G-Flex) to both the core and the wood surfaces. Clamp the pieces together, ensuring proper alignment, and allow the glue to cure completely.
-
Turning and Shaping: Mount the ring on a chuck and use a spindle gouge or skew to carefully reduce the wood to the desired shape, slightly recessing it below the ceramic core’s surface.
-
Finishing: Apply multiple coats of thin CA glue, building up a durable finish. Sand and polish the ring using progressively finer grits of sandpaper and polishing compounds.
Key Tips and Considerations
- Always wear appropriate safety gear, including eye protection and a dust mask.
- Ensure all tools are sharp for clean cuts and minimal chatter.
- Be gentle and patient throughout the turning process, especially when working with thin material.
- Pay close attention to grain direction when selecting and preparing your wood blank.
- Clean all surfaces thoroughly before gluing to ensure a strong bond.
- Use a high-quality adhesive, preferably a two-part epoxy for maximum durability.
- Allow ample time for the glue to cure completely before turning.
- Practice makes perfect! Don’t be discouraged if your first few attempts aren’t perfect.
By following these steps and incorporating the tips from the video, you can create beautiful and durable wood inlay rings with seamless finishes. Experiment with different wood types and core materials to create unique and personalized pieces.
Featured posts