


Turning a Premium Wooden Pen Kit
Pen turning offers a fantastic avenue for creativity, but crafting a truly premium pen, one worthy of a special occasion or a discerning client, requires attention to detail and a focus on quality. In this post, we’ll delve into the nuances of turning a high-end pen kit, sharing tips and tricks from our video tutorial (see below) to help you elevate your pen turning projects.
What Makes a Pen Premium?
A premium pen isn’t just about aesthetics, it’s a tactile experience. Several factors contribute to a pen’s premium status:
-
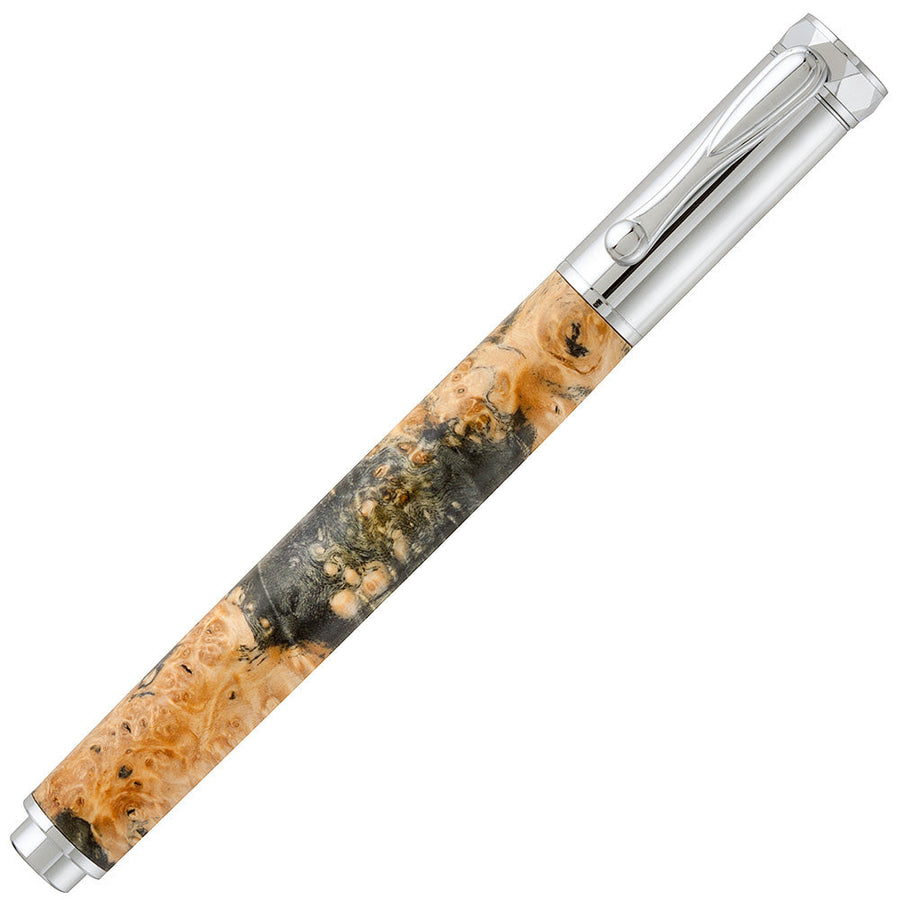
The Kit: Opt for high-quality pen kits featuring durable platings, precise machining, and a smooth writing experience. We showcased the Jr. Statesman Pen Kit in our video, which is available in rollerball and fountain pen versions.
-
The Blank: The blank is the heart of your pen. Choose premium materials like stabilized wood, high-end acrylics, or unique segmented materials. We used a Pippy Yew Stabilized Pen Blank for its beautiful burl pattern, durability, and ease of finishing.
-
The Finish: The finish should complement the blank and provide lasting protection. While CA finishes offer a glossy, robust coat, we opted for a satin finish using Yorkshire Grit after sealing the wood with Thin CA, preserving the wood’s natural warmth and feel.
- The Presentation: A premium pen deserves a premium presentation. Consider a stylish pen box to complete the gift or sale.
Blank Preparation
For a premium pen like this, we’ll take extra care in each step of blank preparation to ensure the best final result. Proper preparation is critical:
-
Measure and Cut to Length: Carefully measure and cut the blank, ensuring accurate lengths for the top and bottom tubes.
- Grain Alignment: Mark the blank before cutting to maintain consistent grain alignment during assembly.
Drilling and Barrel Trimming
Accuracy is paramount during the drilling, and barrel trimming steps:
-
Secure the Blank: Use pen drilling jaws for stability and precision when drilling the blank.
-
Use Sharp Drill Bits: Use sharp drill bits to minimize tear-out and ensure clean holes. Set the lathe speed to approximately 500 RPM when drilling.
-
Careful Tube Insertion: Apply CA glue evenly to the tubes and insert them with a twisting motion for a strong bond.
- Barrel Trimming: Use a vise or pen drilling jaws to secure the blank during barrel trimming. Barrel trimming not only trims excess blank to match the tube, it squares up the end of the blank with the tube ensuring a gap free fit with the pen components.
Turning
This is where the pen’s shape and form take shape. The shape of the blank should match the style of pen kit and should precisely match the mating pen components:
-
Mount the Blank on the Lathe: For premium kits, consider turning each half of the blank separately between centers, rather than using a mandrel. This minimizes flexing which results in precise concentricity.
- Turn to Shape: Utilize spindle gouges and skews to achieve the desired profile and smooth finish.
Finishing and Assembly
The finishing and assembly stages bring the pen to completion:
-
Careful Sanding: Progress through a series of grits to achieve a flawless surface. How high of a grit depends on the type of blank and desired finish sheen.
-
Premium Finish: Choose a finish that enhances the blank’s beauty and provides adequate protection. We demonstrated a satin finish using Yorkshire Grit after a sealing coat of Thin CA glue that paired well with our Pippy Yew blank.
- Precise Assembly: Carefully assemble the pen components, ensuring proper alignment and an accurate fit. Be mindful of the slip-fit design of the Jr. Statesman kit, requiring a small amount of glue for secure assembly.
Featured posts